How to Choose LED Lighting Solutions in 2026?
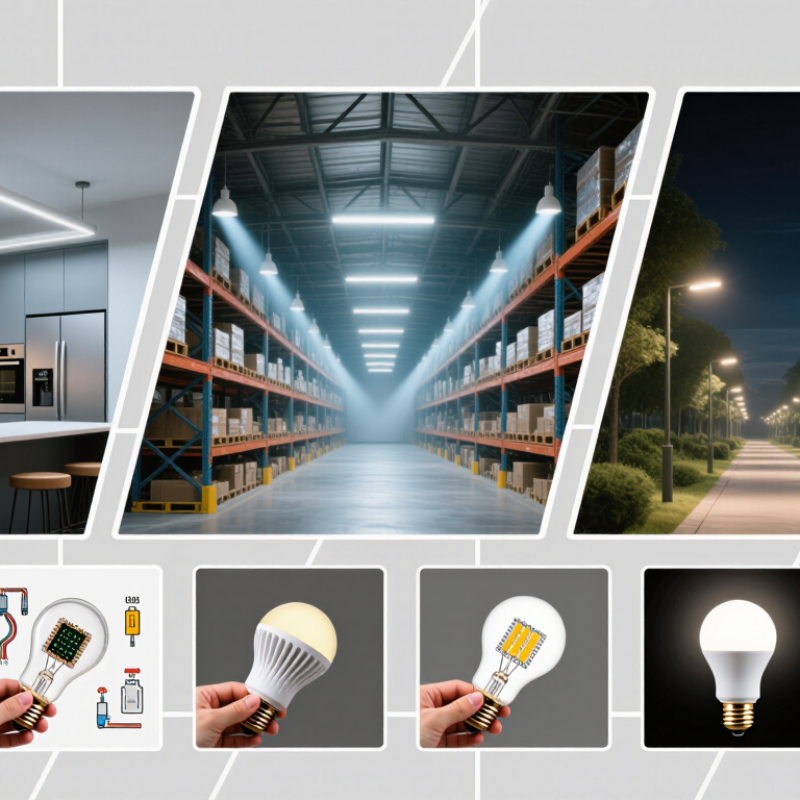
Choosing Led Lighting Solutions in 2026 takes more than comparing prices or picking the brightest fixture. The right option depends on the space, daily use, installation conditions, and long-term operating costs. A kitchen, warehouse aisle, and outdoor walkway each need different light levels and beam patterns. Details matter.
This guide explains how to compare key specifications, including lumens, efficacy, color temperature, color rendering, dimming compatibility, and expected service life. It also covers controls, warranties, replacement needs, and the documentation buyers should review. A product sheet can look convincing, but performance claims are only useful when they match your actual conditions.
Think about the room at its busiest hour. Does a worker need to read labels under a high-bay fixture? Will a hallway sensor switch the lights on and off often? These practical questions can reveal problems that a price list misses. Small details matter.
There is no single best solution for every project. Budget limits, existing wiring, maintenance access, and personal preference can all change the decision. Some trade-offs are easy to overlook, and even a careful checklist cannot replace a site assessment. Compare reliable product data, check applicable local certification requirements, and consult a qualified professional when installation or electrical work is involved. The goal is not simply to buy newer lights, but to choose lighting that fits the space and remains dependable over time.
Define the Lighting Needs and Conditions of Each Space
Choosing LED lighting starts with observing how each space is used, not with comparing wattage alone. A kitchen needs clear light over counters, while a living room may need softer, layered illumination. At a desk, reduce glare on screens and check whether the fixture leaves your hands in shadow. Check the shadows. Hallways and stairs need steady, even light that makes edges easy to see. Note ceiling height, wall colors, window direction, and the hours when daylight disappears.
Match the fixture to the room’s conditions. Bathrooms and covered outdoor areas may need fittings rated for moisture; always check the product’s stated suitability. For reading or detailed work, compare color rendering and brightness, not just color temperature. Confirm that dimmers and LED drivers are compatible, since mismatches can cause flicker or limited dimming. A common planning mistake is choosing a very cool white for every room. It may look crisp in a shop, yet feel harsh at home. This can be easy to miss.
Tips: Test one bulb or fixture before replacing everything. View it in the room at daytime and after dark. Small details matter. If the room still feels gloomy, adjust placement before increasing brightness; a well-aimed lamp can help more than a stronger ceiling light. Keep notes on what feels comfortable, because preferences may change once the space is in use.
How to Choose LED Lighting Solutions in 2026?
Define the lighting needs and conditions of each space. Start by matching light levels to the activities performed there.
Typical task illuminance targets are shown in lux: higher levels suit detailed tasks such as food preparation and desk work, while circulation areas generally need less. Treat these as planning guidelines; surface colors, daylight, user needs, and local standards can affect the final design.
Compare Brightness, Color Quality, Efficiency, and Lifetime
Choosing LED lighting in 2026 starts with the task, not the fixture’s wattage. Lumens measure light output; watts measure energy use. For a kitchen counter, compare the light reaching the work surface, not just the number on the package. A narrow beam may look bright in one spot while leaving nearby areas dim. Easy to overlook.
Color quality affects how food, fabric, and paint appear. Check the color rendering index, or CRI; a rating of 90 or higher can help in spaces where accurate color matters. For reds, look for a strong R9 value, since general CRI ratings may hide weak red rendering. Choose a color temperature that suits the room: warmer light often feels comfortable in living areas, while neutral white can work well for detailed tasks. If possible, view a sample in the actual room. Walls can shift the color more than expected.
Compare efficacy in lumens per watt, but don’t choose on that figure alone. Glare, dimming behavior, and heat management affect everyday performance. For lifetime, check the stated L70 hours—the estimated time until output falls to 70 percent—and read the test conditions. A long rating is not a guarantee in a hot, enclosed fixture. It is tempting to treat published figures as exact. They are estimates, so leave some room for uncertainty.
Check Fixture, Power, Dimming, and Smart-Control Compatibility
How to Choose LED Lighting Solutions in 2026?
Check the fixture before comparing brightness or color. Note its bulb base, dimensions, and whether the housing is enclosed or exposed. Some LEDs overheat in sealed fixtures, even when they fit. Check the product’s rated voltage and confirm that its driver suits your supply. Small details matter. For dimming, match the LED to the dimmer type and check the stated dimming range. A bulb that dims on paper may still flicker or buzz at low settings.
Tips: Photograph the fixture label and existing dimmer. Compare those details with the LED’s specifications, including minimum load and dimmer compatibility. If possible, test one unit before replacing several.
For smart control, check whether the light needs a hub, uses a compatible protocol, or connects directly to your home network. Confirm that your switch can remain powered if the system requires constant power. Also consider control during internet outages; some setups offer local operation, while others have limits. A compatibility chart can miss quirks in older wiring, so check the manufacturer’s technical documentation or ask a qualified electrician when wiring is unclear. I’d avoid assuming that “smart” means effortless. A little checking now can prevent mismatched controls and a box of returns.
Evaluate Safety Standards, Warranty, and Total Ownership Cost
How to Choose LED Lighting Solutions in 2026?
Evaluate Safety Standards, Warranty, and Total Ownership Cost
A fixture’s price tag tells only part of the story. Check its safety certification against the standards and electrical codes applicable in your region. For example, UL 1598 covers many fixed luminaires in North America; verify that the exact model, not just its components, was evaluated by a recognized testing body. Inspect the installation instructions, too. A certified fixture can still perform poorly if it is used in a damp location without the right rating.
Read warranty terms for more than the number of years. Check whether labor, shipping, drivers, and gradual light-output loss are covered. A five-year warranty with costly return shipping may be less useful than it sounds. I still find warranty language easy to misread. Keep the document.
Compare total ownership cost: purchase, installation, electricity, maintenance, and disposal. The U.S. Department of Energy’s 2017 Energy Savings Forecast projected annual savings of 569 terawatt-hours by 2035 from LED adoption, compared with its baseline scenario. That is a sector-wide forecast, not a promise for any one building. Estimate your own costs using operating hours, electricity rates, and measured fixture wattage. Include replacement access; a high ceiling can turn a cheap lamp change into an expensive service call.
Select, Install, and Test the LED Solution for Its Intended Use
How to Choose LED Lighting Solutions in 2026?
Start with the task, not the fixture. A kitchen counter needs clear, even light; a reading chair benefits from a focused beam. Check the required brightness in lumens, then consider color temperature and color rendering. Warmer light can feel comfortable in living areas, while cooler light may help reveal details in a work space. Measure the room and note ceiling height, existing sockets, and likely shadow points. Measure the space. A lighting plan can still miss how a room feels after dark.
Choose a fixture suited to its location and use. Check whether it is rated for damp areas before installing it near a shower or outdoors. Confirm that the lamp and dimmer are compatible; otherwise, flicker or limited dimming may result. During installation, switch off power at the circuit and follow the product instructions. If wiring is unfamiliar, ask a qualified electrician rather than guessing. Secure the fixture properly, and keep heat-producing materials clear of it.
Test the light where people actually use it. Turn it on after sunset, sit at the desk, and check for glare on screens or dark patches on the floor. Try each dimming level and observe whether the color changes noticeably. A small adjustment to position or beam direction may improve comfort more than adding another fixture. Keep notes on what feels too bright or uneven. I have found that daytime impressions can be misleading, so leave room to reassess after several evenings.
| Intended Use | Selection Targets | Installation Checks | Testing and Acceptance |
|---|---|---|---|
| Living rooms and bedrooms | Choose a warm white appearance, typically 2700–3000 K. Use dimmable lamps where adjustable ambience is needed. Select total light output to suit room size, layout, and shade type. | Check that the lamp base and dimensions fit the fixture. Confirm the dimmer is compatible with the specific LED and the number of lamps on the circuit. | Check for comfortable, even light without visible flicker, buzzing, or unexpected color differences. Test dimming from minimum to maximum output. |
| Kitchens and work surfaces | Use about 300–500 lux for general or task areas as a planning range. Consider 3000–4000 K and a color rendering index (CRI) of at least 80; higher CRI may help with color-critical tasks. | Position task lighting to reduce shadows and glare. Check under-cabinet fittings for suitable heat management and protection from expected moisture or splashes. | Measure illuminance on the work surface with a light meter. Check that counters are evenly lit and that fittings do not create distracting reflections. |
| Home offices and study areas | Plan around 300–500 lux on the task plane, with 3000–4000 K as a common neutral-white range. Choose low-glare optics and a CRI of at least 80 for general work. | Place fixtures to avoid reflections on screens and strong shadows from the user’s hands. Verify any dimming or smart-control system works with the LED driver. | Measure light at desk height and check the screen from normal viewing positions for glare. Confirm brightness and color remain acceptable at all control settings. |
| Retail displays and color inspection | Select the color temperature to suit the merchandise and space. Consider CRI 90 or higher when faithful color appearance is important; review any available color-rendering data for critical applications. | Use beam angles and aiming positions that highlight products without excessive glare or unwanted shadows. Keep the same color specification across fixtures in a display area. | Inspect representative items under the installed lighting. Look for noticeable color shifts between fixtures and confirm the beam covers the intended display area. |
| Offices, classrooms, and shared spaces | Use approximately 300–500 lux on work surfaces as a common planning range. A 3500–4000 K appearance is often selected for neutral white light; consider glare control and uniformity. | Check fixture spacing, mounting height, emergency-lighting requirements, and compatibility with occupancy sensors or building controls. | Measure illuminance at representative work-plane points. Confirm controls respond correctly, fixtures start reliably, and no persistent flicker or objectionable glare is evident. |
| Hallways, stairs, and circulation areas | Prioritize consistent coverage and safe visibility. Select output and beam distribution for the space geometry; use a warmer or neutral color temperature to suit adjacent areas. | Check that steps, changes in level, and corners are illuminated. Verify sensor coverage and ensure controls do not leave required routes unexpectedly dark. | Walk the route under normal operating conditions. Check for dark patches, harsh brightness transitions, delayed sensor activation, and reliable switching. |
| Bathrooms and damp indoor locations | Choose a color temperature suited to the room, commonly 2700–4000 K. Select a luminaire with an ingress-protection rating appropriate to its specific location and exposure. | Follow local electrical rules for bathroom zones and installation. Check the product’s stated IP rating and do not assume that a lamp alone makes an unsealed fixture water-resistant. | After installation, check operation and controls with the area dry. Confirm seals, covers, and cable entries are correctly fitted according to the manufacturer’s instructions. |
| Outdoor paths, entrances, and exposed areas | Choose a weather-suitable luminaire and a beam pattern that lights the target area without excessive glare. For exposed locations, IP65 is a common selection where dust-tight construction and protection against water jets are required; it does not mean the fitting is suitable for immersion. | Check the site’s actual exposure, mounting position, cable entries, and local electrical requirements. Use a product rated for the expected temperature and outdoor conditions. | Test after dark. Check coverage, glare toward windows or neighbors, sensor operation, and that water cannot enter through incorrectly fitted seals or connections. |
| Replacement lamps and general upgrades | Compare lumens rather than watts to match brightness. As a rough incandescent reference, about 450 lm is commonly associated with 40 W, 800 lm with 60 W, 1100 lm with 75 W, and 1600 lm with 100 W. Check beam shape, color temperature, and CRI as well. | Verify cap or base type, lamp dimensions, enclosed-fixture suitability, voltage, and any fixture temperature limits. Check that the LED’s wattage is within the fitting’s rating. | Compare the installed light with the intended brightness and spread. Check for startup delays, flicker, excessive heat, or interference with nearby electronic equipment. |
| All LED applications: efficiency and controls | Compare lumens per watt between products with similar light quality and distribution; efficacy varies by product and operating conditions. For dimming, confirm explicit compatibility between the lamp or driver and the control. | Follow wiring diagrams and installation instructions. Isolate power before electrical work, use a qualified electrician where required, and avoid enclosing products unless they are rated for that use. | Run the system through normal operating modes, including sensor and dimmer settings. Where flicker performance matters, consult measured product data and test under the actual control and load conditions. |
Note: Illuminance ranges are planning guidance, not universal requirements. Final targets depend on the task, room geometry, surface reflectance, user needs, and applicable local standards.
Related Posts
-
10 Tips for Sourcing LED Lighting Solutions Globally
-
Where to Find China Top LED Lighting Solutions?
-
Revolutionizing Efficiency: The Impact of LED Lighting Solutions on Energy Consumption and Cost Savings
-
How to Choose the Best LED Lighting for Your Needs?
-
Global Success: Elevating Quality with China-Made Best House Lighting Solutions
-
Innovative Best Led Lighting Options Transforming Commercial Spaces with Energy Efficiency Data